Room Measurement Tutorial for Dummies Part 1
There are few more things transformative in audio than learning how room acoustics works. You never look at any system the same again. Like moving from film photography to digital, measurements give you instant feedback on what your system is doing. Even if you choose to not make any changes to the system, performing measurements can advance your knowledge of audio. So I hope everyone of you reading this post will try to measure your room.
My promise to you in return is to give you the world’s simplest and most foolproof way to perform room measurements. And do so in a manner that get gets you professional results with substantial ability to go as deep as you want.
There are a number of videos and guides online on how to do this but in my opinion, they all use the wrong approach. Namely, they attempt to show you in one go how to do everything. Problem with that is a number of things can go wrong along the way that lead to failure and giving up. My approach may seem odd but please trust me. It is the best way to do this and is actually what I did myself to learn to use the tool. And comes from seeing so many people try to take the full bite and fail.
Room EQ Wizard
The tool of choice is a computer program called Room EQ Wizard or REW for short. Sadly there is no wizard in the program. Once you learn how to use the program, it is powerful and quick to use. Until that point though, the program can seem impenetrable even if you are computer savvy and know about measurements. The pitfalls are non-standard user interface, use of heavy technical jargon (“tukey window” anyone?) that even caused me to not know which end was up. It was only through significant experimentation and creating “controls” where I knew what the outcome had to be, did I manage to figure out how the program works. The path I am going to show you here will keep you from facing these difficulties.0. First step is downloading the program. You used to have to register in a forum to get it but it now has its own web site. Downloading is hassle free, no spam, not garbage. http://www.roomeqwizard.com/
REW is written in “java” which means that it is pretty portable and runs on Mac and Windows. The downside is that it is written in Java which means the stupid thing (Java that is) will sit in the background and forever pester you to upgrade it, and opens your computer to security holes. I enable and disable it as I need it. I suggest for now leaving it enabled until you get through the program. A few days of use is not painful.
This is ALL you need for this part of tutorial as far as hardware and software! Yes, you heard me right. You don’t need to buy a microphone. You won’t even be hooking up your laptop to your audio system. All I want you to do is get through running the program and importantly, learn the steps to generate test tones and measure the response. The sound will be produced by your laptop speakers. And measurements performed using its built-in microphone.
No, this won’t be the real measurements of your room since your laptop speakers suck and the microphone sucks nearly as much. The reason I want you to start this way is that the hardest part of this is using the program. Last thing we need is adding other bits to it that can also cause problems of their own. Most computers have working microphone and speakers so we are good to go there for testing. Once we are comfortable with this step we can move to adding hardware and making real measurements.
1. Install REW and run it. My version checks for new versions all the time at start-up. Cancel out of that if you see it and let the program start. You should see this screen:
2. Ignore everything but the one button to the top left that I have highlighted in yellow called “Measure.” Hit that button. REW will pop up an error message complaining about Calibration. Ignore that! And tell it to “continue anyway.”
You should then see this pop up window:
Ignore everything but the two VU meters on the right. There are two numbers at the bottom and red indicator on the bar graphs. See if the numbers are dancing up and down by a bit. Whistle or shout into the laptop and see if they jump way high. If you have used your laptop for skype or anything elses that uses the mic, you should be good to go here.
If you don’t see the VU meters changing, your computer microphone is not working. Stop here. Don’t do anything else until you figure this out. For Windows users, go to the sound control panel, select the microphone and make sure it is not set to mute, or its level at zero. Many laptops have a function key that mutes and unmutes the microphone. Check to make sure you have not activated the muting this way.
3. Assuming you are seeing the levels changing with sound, next step is to hit the button on the left that says “Check Levels.” You should hear a hissing sound like FM radio with no-station. Those of you who use AVRs, should be familiar with this test tone for calibrating your speaker levels. This only plays for a few seconds during which the VU meters should shoot way up.
If nothing plays, then you have a playback problem in your computer. Start your favorite media player and have it play some music on your laptop. If you have changed the default output to USB DACs, etc. you need to defeat those so that the music comes out of the laptop speakers. Once there, then REW should work just the same and the broadband test noise playing by hitting Check Levels again.
REW will then report on a level in green, yellow or red. This is the amount of headroom you have in dB SPL. REW likes to have about 10 dB SPL of headroom. Anything lower and REW complains with a red SPL value:
Use the text field called “Level (db FS)” and hit the down button on it and keep testing until the level shows green. You can see mine set at -25.0 in this snapshot.
If your microphone or system is not working, which you should have caught earlier, you will see something like this:
This is basically “digital zero” with the program unable to capture anything. In my case, my mic was set to mute.
Here is an OK level:
Notice that all I had to do is lower the db SPL a couple of notches.
Alas, this exercise can be futile. The test tone REW uses here is different than the one it uses to make its real measurements. The reason to go through this is because the controls to adjust the levels is the same when we make the actual measurements. And this step aids in further troubleshooting if the basics are not working right.
5. Now that the basic checks are done, we are ready for our first measurement. How exciting! Before you can do that, you need to fill out the two text fields I had highlighted in the user interface. Those are the frequency range of the measurements. It wants to know the start and stop frequencies. Put in 20 for the first box and 20000 for the second. Now hit the “Start Measure” button.
At first you likely hear nothing even though the program seems to be doing something. That is because your laptop speakers can’t reproduce 20 Hz. After a while, the frequency gets high enough that you start to hear a tone that is changing in pitch. It rapidly changes in frequency all the way up to 20 Khz. For the same reasons as the bass, and your hearing, likely you won’t hear the last part of this sweep either. That’s OK. We are just learning about the system.
During this measuring, REW puts up a “headroom” message and a changing SPL number much like when you were checking levels. Once again, if this number runs into values in red, your signal is too hot. Likewise blue means your levels are too low. Use the Levels control to change the levels or the speaker level in your PC if you can’t boost it enough in REW.
REW seems happy with numbers in 10 to 20. I like to get it as close as I can to 10 so that the measurements I make are well above the room noise floor. For this testing anything in green is fine because we are just playing. But when the time comes to make real measurements, this becomes important.
Alas, adjusting levels in this mode can be tedious as every time REW is done with the measurement, it goes back to the main program interface with the new measurement captured:
If your levels were wrong, ignore what you see and click “Measure” again and go back to the measurement window and adjust the levels. Keep doing this until you get satisfactory levels.
6. Congratulations. You just made your first room measurement! Or I should say the capabilities of your laptop speaker and mic. You should see two things here. One is your measurement in a much smaller window on the left. But also a much expanded version on the right as you see in mine. If you see the little graph on the left but not on the right, then use the scroll bar to the left of the large graph and go up and down and you should be able to find it.
The X (horizontal) axis is the frequency. The Y (vertical) axis is the playback “SPL Level.” I put that in quotation mark because the absolute numbers there are completely wrong. We could have set our mic and speaker level to anything and change those numbers. Good news is that this does not matter!!! In acoustics measurements, we only care about the shape of things, i.e. relative values. We care that at say 50 Hz, we had a peak that was 10 db higher than at 1 Khz. We don’t care what the actual measured value was at either point.
Attempting to get accurate SPL levels is the biggest mistake users of REW make! Do not fall in that trap. There is no useful information in there. Getting accurate levels is possible but requires extensive detective and configuration work with no net value. Get an SPL meter if you want to calibrate your system.
Back to our measurements, you can see the response of my laptop above with the TV playing in the background and the limit of 10 KHz. As expected my laptop speakers don’t play below 300 Hz. And high frequency response was shot after about 7 or 8 Khz. Isn’t this type of information revealing? Could you have guessed these limits from just looking at your laptop or playing music?
As you keep making measurements, REW stacks each one of them on the left. By clicking on any of them, you see that graph.
6. Now is the time to get comfortable with the program. Make another measurement but this time cup your hand over the microphone or speakers and see how the graph changes.
To see all the measurements at once to compare them, click on the button that says “ALL SPL.” You see a list of checkboxes at the bottom. Click them on and off and graphs appear and disappear. The color of the graph matches the measurement lists on the left. Speaking of that, click on where the date is and type whatever you want. I put in the name of the measurement such as, “speaker covered by hand.” There is also a white box for any comments you want to add.
To delete a measurement click on the red “x” on the measurement bar on the left. Go ahead, delete all of them and then make a new measurement. Get comfortable with the interface.
Click on the button on top right that says “Limits.” Change the left and right number and that would change the range of frequencies seen. If you want to see just the bass, set the low to 20 Hz and high to 200 Hz. That won’t show much now given the limitation of the laptop but is essential when the time comes. Top and bottom set on the left adjust the high and low of the display. Again, ignore the second set on the right.
Go to File menu and click Save. What REW saves is the entire set of measurements shown in the left vertical bar, not single ones!
This is all I want you to do in this lesson. The rest is quite a bit easier. Have trouble? Ask questions here. Let’s get everyone to finish this part before we move on.
Room Measurement Tutorial for Dummies Part 2: Selecting a Measurement Microphone
I hope everyone has read the first part of this tutorial on downloading and installing Room EQ Wizard. Here is the link to that if you missed it:http://www.whatsbestforum.com/showth…Dummies-Part-1
In there, I explained how you can use the built-in microphone in your laptop to become familiar with how REW works. I hope you have done that as it is critical to learn the program first before complicating it with external hardware and such.
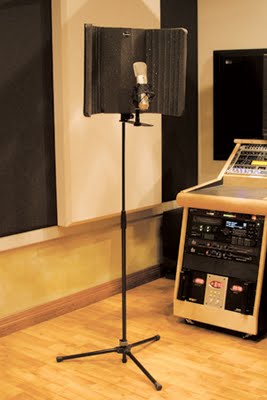
For real measurements though, you want to use a purpose-built measurement microphone and that is the topic of this installment. Measurement microphones are just that: designed for room and loudspeaker measurements and not necessarily sound good for recording and such. They also tolerate high SPLs (volume).
There are a number of measurement microphones from multi-thousand dollar industry reference Brüel & Kjær (B&K) (seehttp://www.bksv.com/doc/ba5105.pdf) to cheap USB Microphones and some in between. Happily for what we are going to do, even the cheapest microphone will do. Our room response variations in low frequencies are many dBs, dwarfing any small accuracy differences between measurement microphones. Now, if you are doing this for a living and want to publish papers and such, and have others be able to replicate your work, then you need to buy the B&K and have it routinely calibrated. But that is not the business we are in.
In the lower end of the market, you have a choice of buying a microphone that outputs analog signals and hence needs an adapter of sorts, usually a USB “sound card,” and typically one with phantom power. My strong recommendation is to not do that. Instead, get yourself an all-in-one USB microphone. These are plug-and-play. What comes out is a USB cable and both Mac and Windows PCs have built-in drivers for them.
One criticism of USB microphones is that they may not work for timing analysis in REW. As you will see, we will NOT be using timing analysis in REW. In that regard, there is no compromise in using a USB microphone and you get all the simplicity of them with no drawbacks.
The “in” microphone to use with REW seems to be seasonal thing. A couple of years ago when I bought mine, the Dayton Audio UMM_6 was the one to get http://www.daytonaudio.com/index.php…icrophone.html. I just looked on Amazon for it and for some strange reason, it shows a lead time of 2 to 6 months to purchase from the company. Fortunately, Parts Express also sells through Amazon and they seem to have them in stock:http://www.amazon.com/Dayton-Audio-U…M-6+microphone. As you see, the discounted cost is just $88.
Another option is the Minidsp UMIK-1: http://www.minidsp.com/products/acou…urement/umik-1. I can’t find a good price for that on Amazon but as you see in that link, the company itself sells it for $75.
Before you hit the buy button, let me talk about calibration. Both the UMM-6 and UMIK-1 come with a serial number that you type online and it gives you a (supposedly) a calibration file to use with REW. My recommendation is to not bother! Yes, you heard me right. You don’t need a calibrated mic and these files themselves can be faulty. The difference between calibrated and non-calibrated mics is small and it is in a region that I suggest you use your ear, not an instrument, to adjust the sound.
Now, if you insist on having them calibrated, there is a very low cost way to get there and that is to buy the above microphones from Cross Spectrum Labs: http://cross-spectrum.com/. For just $20 to $30, you get the same microphone but now it comes with a calibration file (or multiple for different angles). I was in a hurry when I bought mine so I bought it on Amazon. If I were not, I would have spent a few more dollars on Cross-Spectrum to support this nice service as calibration usually is a very expensive affair. But again, it is not necessary.
Once you get your microphone, then all you have to do is plug it and either tell your operating system it is the default recording device, or tell REW to use it instead of the built-in microphone. Now repeat the lessons in the first tutorial. Compare the results to the built-in microphone. You should see less low frequency roll off and more accurate overall curve.
In the next tutorial we will get into the meat of these of lessons which is to actually perform the measurements and understand what they mean.